
Please note: This post was sponsored by Sticker Mule. We only promote products and services that we believe our readers will find valuable, and all opinions expressed in this post are our own.
If you’re an artist or designer, you might be searching for new ways to promote your work and earn extra income. A fun way to do it is by printing your own stickers, and Sticker Mule is among the top places to have them printed.
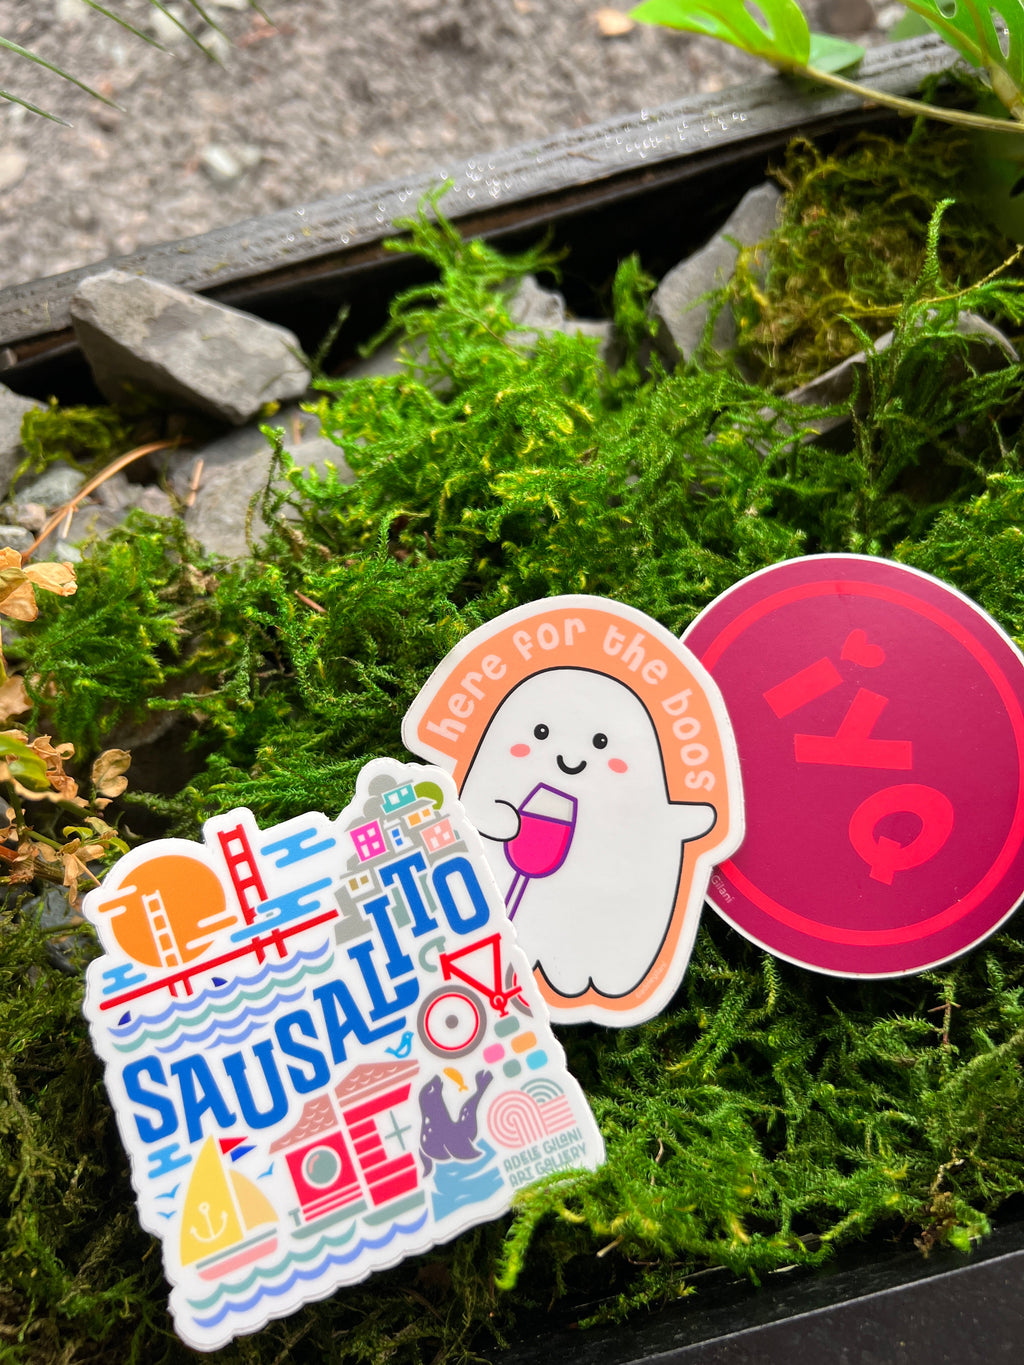
For the past four years, I've been using Sticker Mule to print my own high-quality vinyl stickers. Not only are they printed on thick paper and dye cut, but they’re also priced to sell.
By subscribing to Sticker Mule, I get weekly deals that allow me to try out new products with extremely low risk. For example, a recent deal let me get 50 circle stickers for $19 (normally $58) with free shipping. Once I print something I like, I can easily order more at the bulk rate and mark up the price to sell in my shop or to other businesses, depending on the quantity I order. Sticker Mule has been a game changer for me, and I highly recommend it to anyone looking to print their own stickers.
Here's how to use Sticker Mule to print your own art stickers:
Step 1: Create your design
Before you can print your stickers, you need to create a design. Make sure your design is at least 300 dpi (dots per inch). Sticker Mule has a system in place to notify customers if their image is too low resolution for printing. When you upload your design, their system checks the resolution and provides a warning message if it is below their recommended resolution of 300 dpi.
This ensures that your stickers will come out looking their best and prevents any disappointment or waste of resources.You can use any image editing software, such as Photoshop or Illustrator, to create your design. You can upload the design file, you don’t have to export to JPEG or PNG.
Step 2: Choose your sticker type
Sticker Mule offers a variety of sticker types, including die cut, circle, square, and more. Choose the type of sticker that best fits your design and budget.
Step 3: Upload your design
Once you've chosen your sticker type, upload your design to Sticker Mule. They accept a variety of file types, including PNG, JPEG, PDF, and AI.
Step 4: Choose your options
After uploading your design, you'll be able to choose additional options such as size, quantity, and finish. Sticker Mule offers a variety of finishes, including matte, gloss, and holographic.
Step 5: Review and approve your proof
Before Sticker Mule prints your stickers, they'll send you a proof to review. Make sure everything looks good and approve your proof to move forward with printing.
Step 6: Wait for your stickers to arrive!
After approving your proof, all that's left to do is wait for your stickers to arrive! Sticker Mule offers fast turnaround times and free shipping on all orders.
In conclusion, if you're an artist or designer looking to print your own custom stickers, Sticker Mule is an excellent option to consider. With their high-quality printing, low-risk pricing, and wide range of sticker types and finishes, you can easily create and sell your own stickers. Check out their website at https://www.stickermule.com/ and give it a try!


Adele's 2023 Holiday Gift Guide
Welcome to my 2023 Gift Guide. These are some of my favorite things right now, from art supplies to limited edition prints, enjoy this Holiday Gift Guide with 12 items...

Curating the Future, How to Make Your Art Discoverable
When it comes to curating content for Adele Delivers, my weekly newsletter where I deliver two contemporary artists right to your inbox, I'd like to share how I discover artists... Read More


How to Start An Artist Blog
Help! I want to start a blog on my artist website but I don’t know what to write about.

Acrylic Paint Palette Cleanup 101: Eco-Friendly and Artist-Approved
Here's my artist palette cleaning method, an eco-friendly and sink-safe approach to cleaning your palette after a painting session as well as links to the equipment I use.


5 Tips to Keep Your Art Studio Organized
Unlock the secrets to a more organized art studio.


Art School, Is It Worth It? And My List of 55 Exciting Art Fields of Study
In art school, you'll acquire invaluable skills across various visual mediums, which is essential for building your artistic foundation. However, to ensure a more stable income right after graduation, it's...
0 comments